Chiller News
Precise Temperature Control for Laser Systems and Industrial Applications Since 2002
Language
As operations resume, restart your laser chiller by checking for ice, adding distilled water (with antifreeze if below 0°C), cleaning dust, draining air bubbles, and ensuring proper power connections. Place the laser chiller in a ventilated area and start it before the laser device. For support, contact [email protected].
With the holiday season coming to an end, businesses around the world are returning to full operations. To ensure your laser chiller runs smoothly, we’ve prepared a comprehensive chiller restart guide to help you quickly resume production.
1. Check for Ice and Add Cooling Water
● Check for Ice: Early spring temperatures can still be quite low, so before starting up, be sure to check if the pump and water pipes are frozen.
Defrosting Measures: Use a warm air blower to thaw any internal pipes and confirm the water system is free of ice. Run a short-circuit test with the pipes to ensure there’s no ice buildup in the external water pipes.
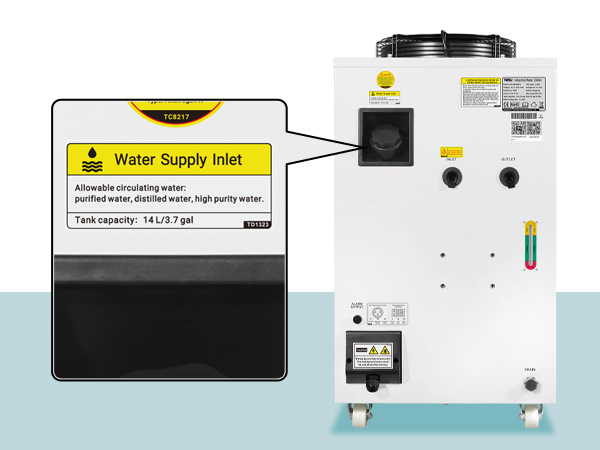
● Add Cooling Water: Add distilled water or purified water through the laser chiller’s filling port. If the temperature in your area is still below 0°C, add an appropriate amount of antifreeze.
Note: The water tank capacity of the chiller can be checked directly on the label to avoid overfilling or underfilling. If the temperature is above 0°C, antifreeze is not necessary.
2. Cleaning and Heat Dissipation
Use an air gun to clean the dust and debris from the filter gauze and condenser surfaces to maintain the heat dissipation performance of the laser chiller. Make sure there’s no dust buildup that could affect cooling efficiency.
3. Draining and Starting the Laser Chiller
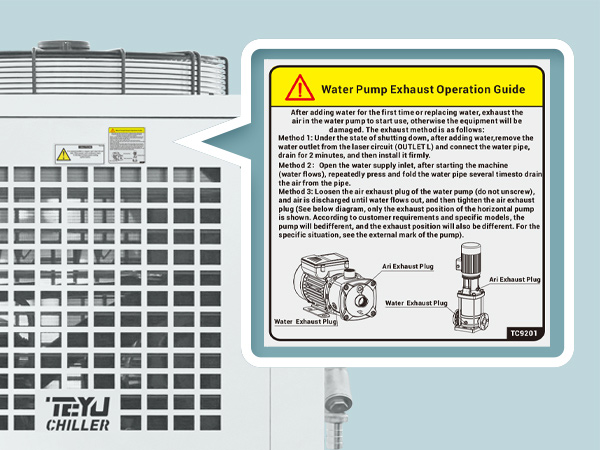
● Drain the Chiller: After adding cooling water and restarting the chiller, you may encounter a flow alarm, usually caused by air bubbles or minor ice blockages in the pipes. Open the water filling port to let air out, or use a heat source to raise the temperature and the alarm will automatically reset.
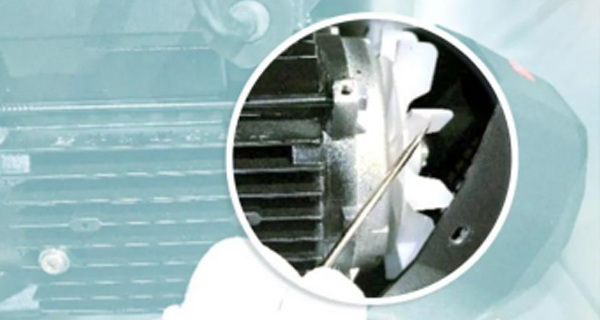
● Starting the Pump: If the water pump has difficulty starting, try manually rotating the pump motor impeller when the system is off to assist with startup.
4. Other Considerations
● Check the power supply lines for correct phase connections, ensuring the power plug, control signal wires, and ground wire are securely connected.
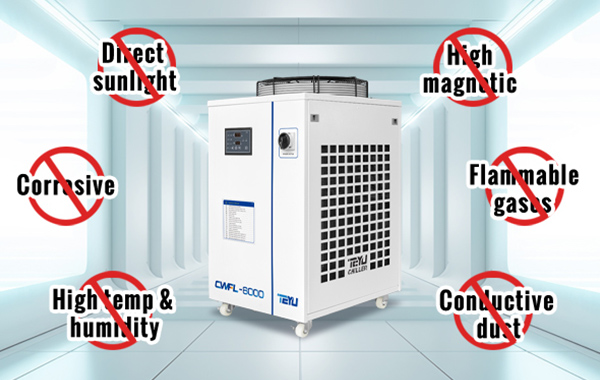
● Place the laser chiller in a well-ventilated environment with an appropriate temperature, avoiding direct sunlight, and ensuring there are no flammable or explosive materials nearby. The equipment should be placed at least 1 meter away from obstacles, with larger chiller units requiring more space for heat dissipation.
● When using the equipment, always turn on the laser chiller first, followed by the laser device, to ensure proper operation.
If you have any questions or encounter difficulties with the above steps, please contact our tech support team via email at [email protected]. We are delighted to assist you.
We're here for you when you need us.
Please complete the form to contact us, and we'll be happy to help you.

TEYU S&A Chiller was founded in 2002 with 23 years of chiller manufacturing experience, and now is recognized as a cooling technology pioneer and reliable partner in laser industry.
Copyright © 2025 TEYU S&A Chiller - All Rights Reserved.